


Bag Rubbed Lime Render Finish
Posted by Ian, Celtic Sustainables on 22nd Mar 2018
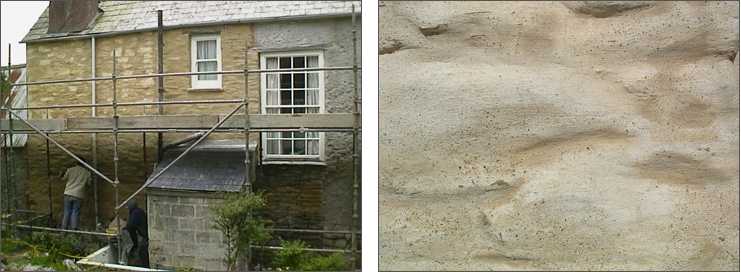
Not patient enough to re-point a stone wall? Not yet confident enough to apply a perfectly flat coat of render? There is an easier ‘half way’ technique, a traditional finish between pointing and rendering that doesn’t require any specialist tools or skills.
Welcome to the world of Lime Bagging! No, I’m not talking about packing fruit, this is a time tested, method of applying a protective coat of lime to stone walls. Easy enough for most able-bodied people to carry out, the result is an undulating smooth finish, that protects the masonry, whilst still hinting at the natural beauty of the stonework below.
What you will need
OK, so you’re going to need to grab a bucket of lime mortar a pair of protective waterproof gloves and a piece of hessian or a sponge.
Protection
Lime is Caustic, so you’ll need goggles and strong rubber gloves (dish washing gloves are OK). Make sure those arms and legs are covered as well.
Choosing the correct mortar
There are a few options available to the wannabe bagger, The main consideration when choosing a mortar is the strength. The chosen product/mix should be weaker than the masonry being covered. This will reduce the possibility of future frost damage to the masonry, as such the lime should act as a sacrificial coating, absorbing any movement in the walls as water freezes and expands. The softest most flexible and indeed most breathable option is a lime putty based mortar, such as our ready to use Coarse Stuff. Moving up the strength scale you have the Natural Hydraulic Lime (NHL) mortars such as Cornerstone drymix, which have a harder finish and dry quicker, but conversely are less flexible and less breathable. If the work is inside or in a sheltered area, I would suggest using a putty mix every time. If however the wall is in an exposed area, it would be worthwhile considering NHL options.
*Of course if you’re a little more experienced with mixing lime mortars, you can buy the raw ingredients and mix up a mortar yourself.
Preparation
Ensure ambient and surface temperatures are consistently above 5 degrees Celsius during the application and the curing process.
Surfaces need to be free of loose material, clean of any paint or chemicals and ideally, there should be at least 10mm depth to the joints around the individual masonry pieces to provide a good key for the mortar.
Next you will need to make sure the wall is damp. Pump-up garden sprayers are great for this job. Alternatively a churn brush and a bucket of water will do the job. The surface should be damp but not soaking wet. This will ensure the lime mortar doesn’t dry too quickly and become crumbly.
Now for the fun bit.
Let’s get it on!
OK then, goggles on (check), gloves on (check) arms and legs covered (check). Grab a handful of your chosen mortar, turn towards the wall and carefully Harl it (posh word for throw) onto the surface, aiming for the joints. Throwing the lime onto the surface helps to force it into the gaps. To further aid the adhesion and get some shape into the surface work the mortar into the joints with your fingers. Grab another handful of mortar and this time press it over the existing spreading the excess over the face of the stones with the palm of a gloved hand. Step back admire your handywork and repeat, using a combination of the throwing and spreading techniques.
As you work your away across the wall, ensure that the unfinished surface is still damp, if it has started to dry, damp it down again with your chosen method and continue with the application,
Baggin’ It
Once you have covered a reasonable sized area, and while the mortar is still workable you can start the bagging process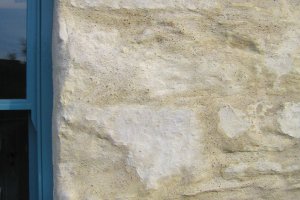
Traditionally this bit is done with a piece of Hessian rolled into a pad (I presume hessian bags were originally used, hence the amusing terminology). However any similar hard wearing material or a sponge will suffice.
Take your bagging tool of choice and rub the mortar in a circular motion. This is done for a few reasons, It works the lime mortar into any remaining cracks, compresses the mortar into the joints and gives the mortar a smoother finish.
Final Smoothing
Once the mortar starts to set, a damp sponge can be used to further improve the smooth finish. Work gently, in a circular motion. Don’t apply to much pressure and make sure the sponge is not too wet, to avoid removing too much mortar from the face of the masonry.
After Care
This is probably the most important part of the process. Whichever type of lime mortar you have used, you must ensure that it doesn’t dry out too quickly as it cures otherwise it will become brittle and possibly fail. If you’re working indoors, keep the room cool, and if necessary give the walls a light misting of water a couple of times a day for the next 48 hours. If you are working externally, protect the walls by hanging hessian sheets in front of the surface, leaving a gap between the sheet and the wall. Spray the hessian with water to create a moist atmosphere in the gap behind the hessian. This will help protect the lime mortar from wind or sun that would otherwise dry out the mortar. The Hessian sheet will also protect the lime mortar against rain damage. If the weather becomes particularly hot, a plastic sheet can be hung over the damp hessian for further protection. Similarly A plastic layer over a dry hessian sheet can offer some protection during cold weather.
If you want, you can limewash the surfaces for extra protection or paint with a breathable paint such as Earthborn Claypaint for interior surfaces or Earthborn Silicate Masonry Paint for Exterior Walls.
And finally, why not throw a bagging party!
Invite a few friends around, and show them how much fun you can have whilst wearing gloves and goggles. It’ll get the job done quicker (possibly) and you can impress your friends by teaching them the techniques you have learned here. Just remember, lime is caustic and can be dangerous so keep the alcohol until after you finish.