How to Re-point a Wall
Posted by Celtic Sustainables on 18th Mar 2019
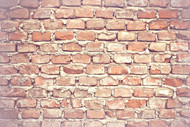
The ‘pointing’ of a wall is what you see between the masonry. It’s the visible part of the mortar joints that hold everything in place. The lime mortar joints on older houses tends to be written off well before their use-by date because the pointing looks and feels a little soft and powdery. But that doesn’t necessarily mean that the pointing has failed, as a mark can be made with a fingernail in old lime mortar even when it’s completely sound. You’ll only really need to do any repointing when the joints become so eroded that rain starts to settle in the gaps.
When you do find that the walls of your house need repointing, bear in mind that there are a few different styles of pointing and some may not suit the style of your property as much as others. It’s usually best to try to emulate the original pointing so that it doesn’t dominate the wall or look inappropriate in its setting.
Repointing is usually needed where the original work has eroded due to weathering, so the need to repoint will vary from one part of a house to the next. Areas which receive less damage from the elements will require less frequent attention, whilst heavily battered walls will need it more often. You will usually find that the walls in more exposed locations or areas of masonry at higher levels will be the most affected by the weather. Therefore, repointing is often done as many smaller jobs rather than one big project.
How to:
- In preparation for the repointing of a brick or stone wall, the old mortar needs to be raked out from the wall to a depth of 20 mm or more.
- Having cleaned and lightly moistened the joint with a fine water spray, the fresh mortar should be moulded into the back of the joint using a pointing tool, and left sitting a little forward of the face of the masonry.
- Once the mortar has begun to harden, the excess can be scraped away to create a flush joint.
- Temporarily cover the freshly repointed areas of the wall with damp hessian sheets to prevent the mortar from drying out too quickly and cracking.
When repointing with lime, the lime product needed will depend upon the hardness or softness of the masonry. It is not usually recommendable to use NHL 5.0 (Natural Hydraulic Lime) as it is generally too hard for most masonry to handle. The trouble with using a mortar that is too tough is that it can cause damage to the masonry when natural movement occurs. We would recommend using NHL 3.5 for most instances, but where the masonry is very soft NHL 2 or a lime putty mix would be better.


